How to Create an Active Shooter Alert
Sometimes it seems like the only news we see nowadays is of mass shootings. Gun violence is everywhere, from schools to public places. It’s more important than ever before for an emergency communication system to be able to address this kind of emergency with an active shooter alert that provides detailed instructions so that everyone knows what to do in an emergency. With MessageNet Connections, you can create an active shooter alert message (and an accompanying drill message) that has both text and audio as well as flashers to get people’s attention more easily. So how can you create this active shooter alert message?
Create a New Message
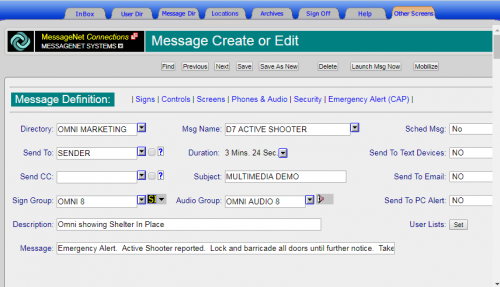
Log in to the MessageNet Connections Administrative Interface and navigate to the Message Directory. Choose a message to use as a template and click on the question mark button to open that message. To create a new message, first select the Message Directory in which the new message will be saved – if you have an Emergency Message directory, it’s best to save the message there. Then, enter a new name (for example, Active Shooter Alert) into the Message Name field. Once those two fields have been changed, click Save as New.
Send to Sender
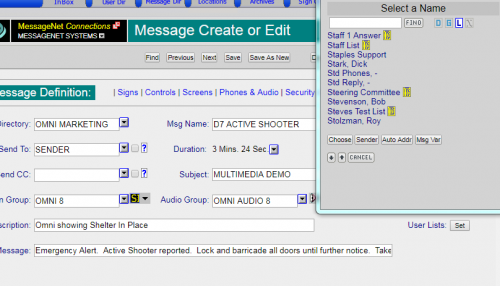
Because this message will display on signs, it’s important for it to be set to send to Sender. This means that the message will appear in the Inbox of the user who sent the message. That user can thus maintain control of the message and can cancel it and relaunch as needed, in case there was a mistake, such as the wrong message being sent by accident. If it’s not configured to send to the Sender, then if the Sender needs to close the message, they will have to contact the person who received the message in order to do so. This could take time in an emergency situation that just isn’t available. Sending the message to Sender instead of to another user will automatically send the message to the Inbox of the user who sent it so if any corrections need to be made, it can be done quickly.
In the Send To field, click on the arrow button – this will open a new window with a list of all users in the system. At the bottom is a button for Sender. Click Sender and then OK.
Select Sign and Audio Groups
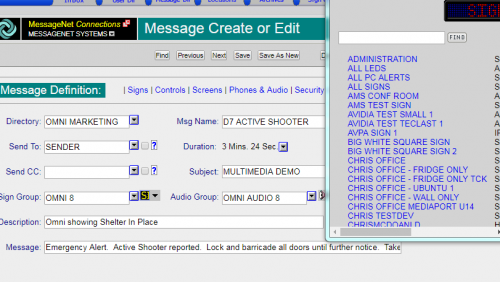
Messages can be sent to any combination of signs, but for an emergency message, it’s recommended that the message goes to all of them. The MessageNet system automatically creates an ALL SIGNS sign group that contains every sign defined on the system – new signs will also automatically get added to this group. If the available signs have audio capability (Omni devices, MediaPorts, IPSpeakers), there will be a corresponding All Signs audio group.
Click on the arrow button for each of the Sign Group and Audio Group fields. Select All Signs in the window that pops up (or other group if needed). Then, click OK to save the change.
Message Text
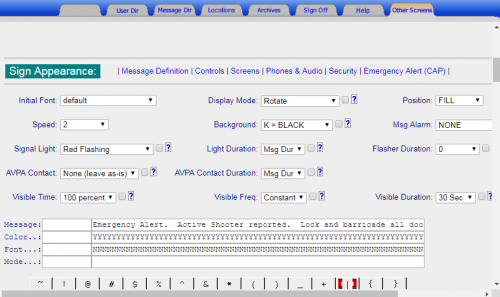
The Message field is where the text that will be the body of the message is entered. This is what will be displayed on the signs. For an active shooter alert, it should read something like this: “Emergency Alert. Active Shooter reported. Lock and barricade all doors until further notice. Take cover. This is not a drill.”
Flashers
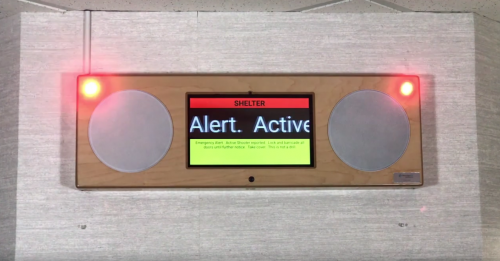
For emergency alerts, flashers are always recommended. They can get people’s attention much more easily than a scrolling message can alone and they are color-coded so anyone seeing the message will readily understand that it’s an emergency. Omni devices and IPSpeakers have built-in flashers.
To add flashers, go to the Sign Appearance section of the Message Editor. The method for adding flashers is different depending on the device. For IPSpeakers, use the Msg Alarm field and select which combination of flashers is needed for the message. For Omnis, the flashers are more sophisticated and have both more colors and more options. For an active shooter message, either flashing red (for emergency) or flashing blue (for shelter in place) is recommended. Select the color and the action in the Signal Light field. Then, in the Light Duration field, select how long that action should be performed (for example, for ten seconds, thirty seconds, the duration of the message, etc.).
Emergency Alert Status
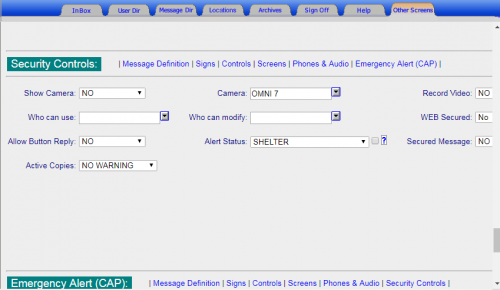
On an Omni device, the background color of the screen can be changed to reflect the emergency alert status of a message. For example, an emergency message will have a red background, while a shelter message will have red at the top and yellow at the bottom. To set the emergency alert status of the message, go to the Security Controls section of the Message Editor. Select the desired status – for an active shooter alert, either Emergency or Shelter is best.
Save the Changes
Once the changes to the message are complete, it’s important to save the message. Scroll all the way back up to the very top of the message and click the Save button. Then, test the message to make sure that it works exactly as expected.
 The MessageNet Connections software and licenses come with a no-risk, money-back guarantee. If you are unhappy with the software for any reason within 90 days of purchase, you may return the software for a full refund.